Navigation
The main window of the Int4 APITester Cockpit is divided into two sections.
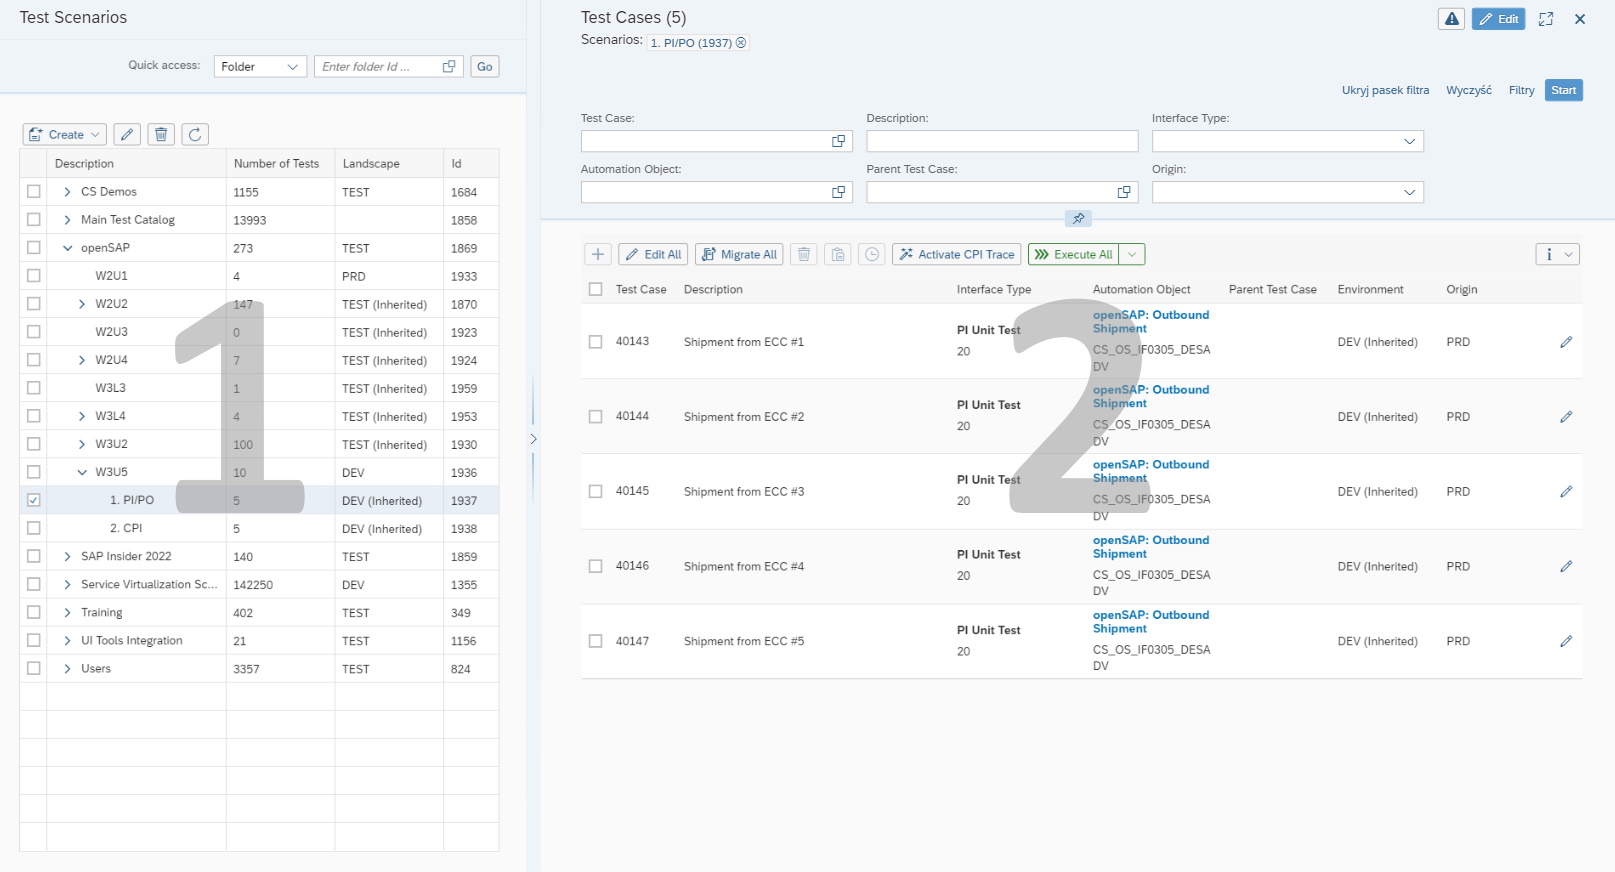
On the left-hand side of the screen you can find a “Test Scenarios” section, which contains a tree with a hierarchy of test scenarios (folders) defined in the application.
On the right-hand side of the screen you can find a “Test Cases” section, which contains a list of test cases for the test scenarios selected in the “Test Scenarios” section.
You are able to modify the width of both sections with the usage of a divider located between the sections.
Test Scenarios Section
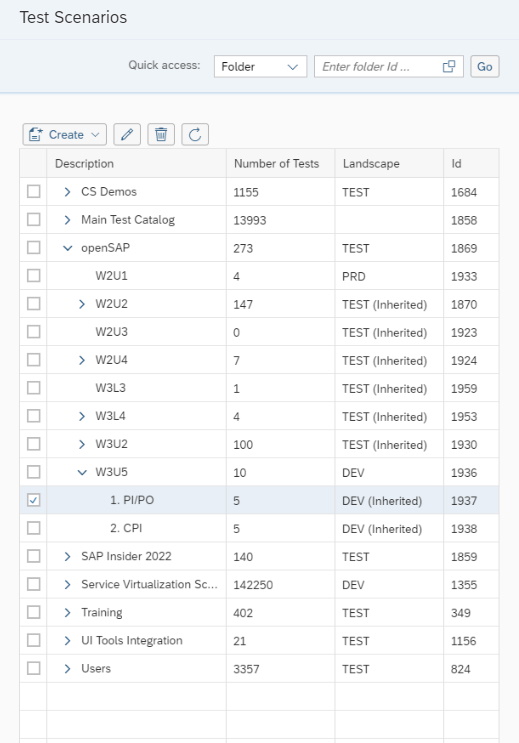
Starting from the top of the screen the “Test Scenarios” section consists of three subsections:
The “Quick Access” subsection
The toolbar subsection
The scenarios tree subsection.
Quick Access Subsection
The “Quick Access” subsection allows to quickly navigate to a desired test scenario (folder) or test case.

First you need to select the type of an object (Folder or Test Case), then provide the ID of the object and press the “Go” button. If an object with the given ID is found, it is presented in the “Test Cases” section on the right-hand side of the screen. If an object is not found, a notification message is shown.
Depending on the object type the “Test Cases” section contains either all test cases for the found test scenario (in case a Folder ID was given) or a single test case (in case a Test Case ID was given).
Toolbar Subsection
The toolbar subsection provides basic functions for the “Test Scenarios” hierarchy.
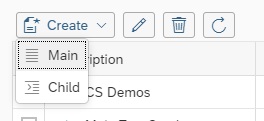
These are:
Create - to create a test scenario
Edit - to modify a test scenario (active only if exactly one test scenario is selected)
Delete - to delete a test scenario (active only if at least one test scenario is selected)
Refresh - to refresh the contents of the tree with the hierarchy.

To create a test scenario press the “Create” button and select if it should be a main or a child scenario. To create a child scenario you need to have a parent scenario selected first.
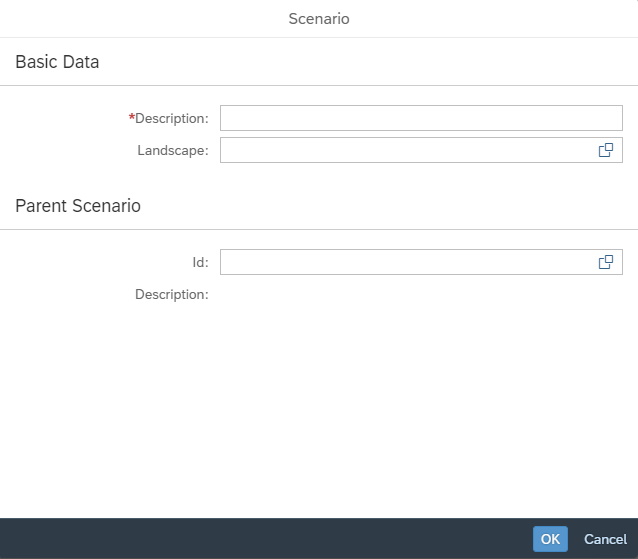
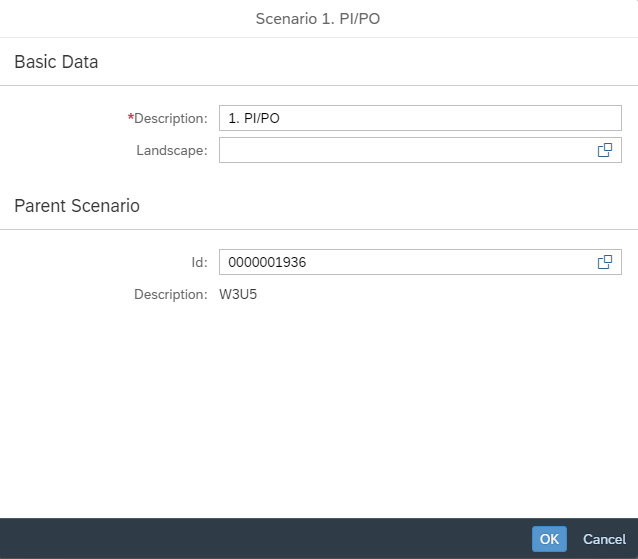
A new window is shown with the details of the new scenario. Provide all the necessary information and press the “OK“ button. The fields that are mandatory are marked with a red asterisk (*).

To make changes to a selected scenario press the “Edit Scenarios” button. You need to have exactly one scenario selected, otherwise system issues an error message.
A new window is shown with the details of the selected scenario. Modify or provide all the necessary information and press the “OK“ button. The fields that are mandatory are marked with a red asterisk (*).

To delete selected scenarios press the “Delete Scenarios” button. You need to have at least one scenario selected, otherwise system issues an error message.
System asks for confirmation before deleting the selected scenarios.
If any of the selected scenarios contains test cases system issues an error message and does not allow to proceed.

To refresh the information contained in the tree with the test scenarios press the “Refresh” button.
Scenarios Tree Subsection
The scenarios tree subsection displays created hierarchy of the test scenarios.
The tree allows to select already created scenarios, this in turn updates the test cases section with the test cases contained in the selected scenarios. The tree also allows to modify the scenarios hierarchy, both by the drag and drop action, as well as the context menu, activated by the right mouse button click.

Test Cases Section
Starting from the top of the screen the “Test Cases” section consists of four subsections:
The header subsection
The filter subsection
The toolbar subsection
The test cases list subsection.
Header Subsection
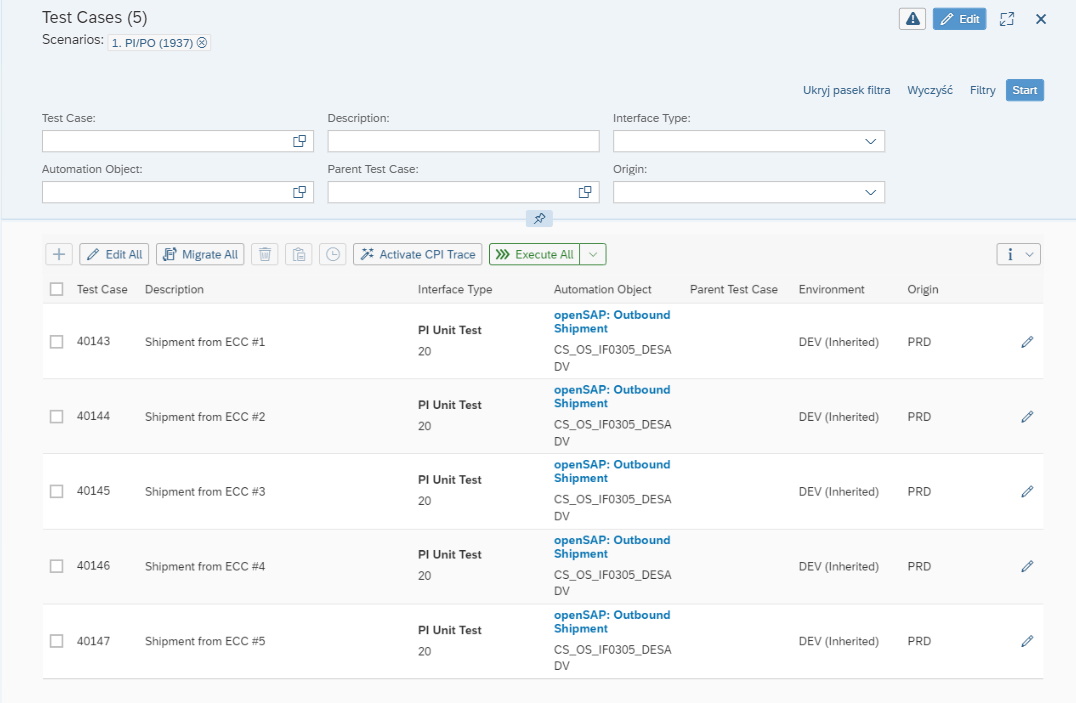
The header subsection contains the title of the test cases section together with the number of the tests cases contained in all selected scenarios.
The selected scenarios are listed under the title of the section. Each of the scenarios has a small close button, which allows to deselect the scenario directly from the test cases list.

By pressing the “Messages” button, located on the right-hand side of the section, you can display all messages recently issued by the system. Any confirmation, information or error messages related to the actions performed on the test cases list are displayed there.

By pressing the “Edit” button you enter the edit mode of the test cases list. In this mode you’re able perform the create, paste and delete actions on test cases list.

In edit mode the “Edit” button is replaced by the “Save” and “Cancel” buttons. These buttons allow you to save or cancel any changes done to the test cases list.
Filter Subsection
The filter subsection lets you filter the contents of the test cases list.

The top-right corner of the subsection contains basic actions, like “Hide”, “Clear” and “Search”. There is also an option to define which fields should be hidden or visible in the filter form.
You can make the filter stay on top of the screen at all times by pinning it (pressing the “Pin” button). The button is located under the fields of the filter.
Toolbar Subsection
The toolbar subsection provides basic functions for the “Test Cases” list. These functions are dependant on the mode the list is in:
Display mode
Execute All/Selected - to execute all or selected test cases
Execute All/Selected with Parameters - to execute all or selected test cases with non-standard parameters
Results - to show results of previous executions for selected test cases (active only if at least one test case is selected)
Edit All/Selected - to mass edit all or selected test cases
Migrate All/Selected - to migrate all or selected test cases
Activate CPI Trace - to activate CPI trace before CPI test cases execution

Edit mode
Create - to create test cases
Delete - to delete selected test cases (active only if at least one test case is selected)
Paste - to paste new test cases from the clipboard
Information - to show additional information about test cases list functions
Toolbar Subsection in Display Mode

To execute all or selected test cases only press the “Execute All/Selected” button. The test execution is immediate and a new browser tab is opened with the test run report. The report contains all the details of the execution.

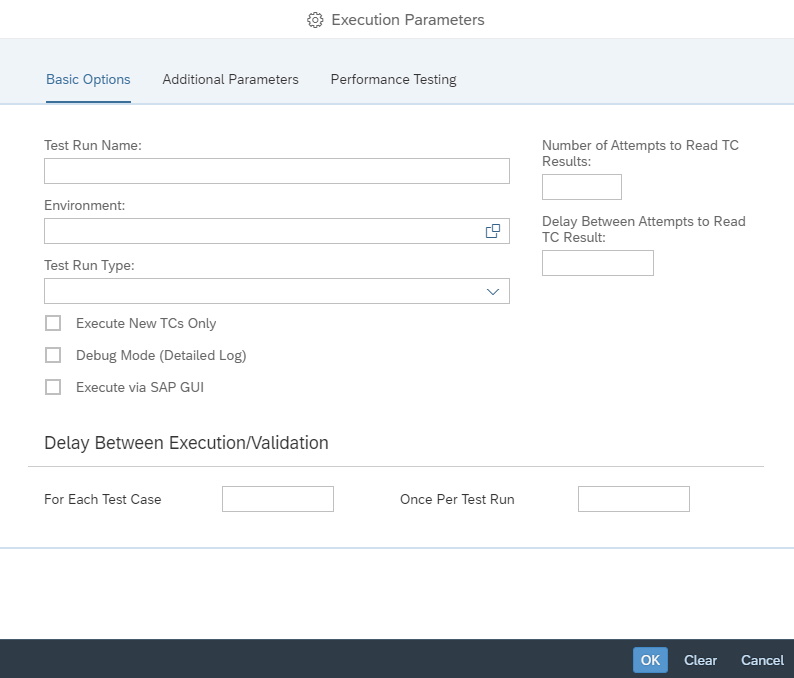
If you want to execute test cases with non-standard parameters then press the “Execute All/Selected w/ Parameters” button. A new window is shown and you’re able to provide non-standard values for the test cases execution. After you’ve entered all necessary information press the “OK” button. The test execution starts at this point and a new browser tab is opened with the test run report. The report contains all the details of the execution.

To view results of previously executed test cases select the ones you’re interested in and press the “Results” button. A new browser tab is opened with the test run report. The report contains all the details of the execution.

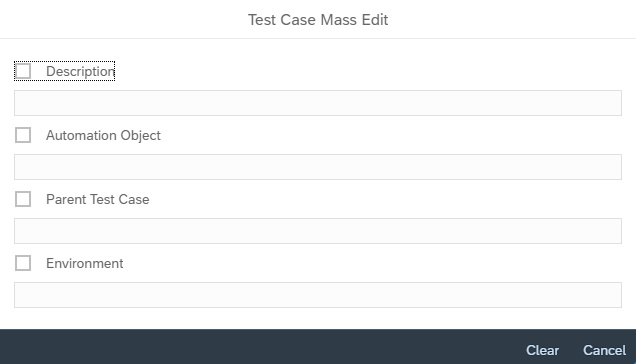
To mass edit all or selected test cases press the “Edit All/Selected” button. This opens a new window in which you’re able to provide new values. After you’ve entered all necessary information press the “OK” button.

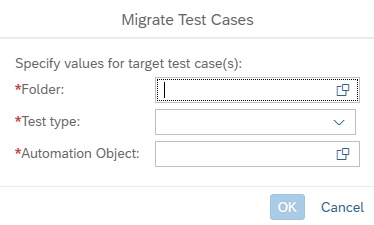
To migrate all or selected test cases from one test type to another press the “Migrate All/Selected” button. This opens a new window in which you’re required to provide all the information necessary for the migration. After you’ve done that press the “OK” button to begin the migration.

To activate the CPI trace press the “Activate CPI Trace” button. This opens a new window in which you can provide environment and/or iFlow details and search for the iFlow for which you want to activate the trace. When found, select it and press the “OK” button.
Toolbar Subsection in Edit Mode

To add a new row to the test cases list press the “Add” button. This creates a new empty row at the top of the list and allows you to provide all the information necessary to create a new test case.


To delete any test case from the list press the “Delete” button. System asks for confirmation before deleting.

To paste test cases from the clipboard press the “Paste” button. New test cases are added at the top of the list and you’re able to modify the pasted information.

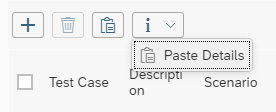
Press the “Paste Details” button if you want to get more information about the test cases paste function. A new window is open which provides details of the data format.
Remember:
press the “Save” button if you want your changes saved.
press the “Cancel” button if you want your changes discarded.
Test Cases List Subsection
The test cases list subsection displays details of test cases which fulfill the filtering criteria and are assigned to the selected scenarios.
The first column allows for test cases selection, where the header row field selects all test cases currently visible in the list.
By pressing on the link in the “Automation Object” column you can open a new browser tab in which details of the automation object are presented.
By pressing on the “Details” button (“Pen” icon at the right end of the list) you can display the details of the test case.

